
I’m taking a break from working on my thesis project to talk about…my thesis project. Or, at the very least, the concepts behind my thesis project. I’m a masochist, what can I say.
Specifically, I’m going to give you the tools and ideas to start building your own digital collages! Obviously, there’s a lot that you can do with collage, and to spend time discussing all of the various tools you could use would be a thesis in itself, so today I’m just going to go over the general concepts. I may toss in a few tool how-tos, but in general I would recommend googling or youtubing how to videos to learn specific tools if you’re so inclined.
Okay, all that hedging out of the way, let’s get to it!
Collage is one of the most accessible forms of remix, removing ownership of an image which exists in context and either removing that context, or creating new context. Remix has been used as a form of art and expression in one way or another since basically the dawn of art, with some of the earliest examples extend from 10th century Japan. In the early 1900s, collage exploded in popularity, driven by many modernist artists, as well as the Dadaists, Surrealists, and more. It became a way to use what already existed to tell a new story in new context.
In modern times, we use collage elements as a voice of the people. This includes famous art pieces, such as the iconic Hope image of President Obama by Shepard Fairey, as well as the memes we share on a daily basis. A great example of a modern video collage, in fact, is the meme video from Downfall, that otherwise forgotten Hitler biopic, which is dubbed with different rant dialogue. In such a way the ownership of the initial video image becomes recontextualizes to the creator of the meme.
All that to say, collage kicks ass. It’s a part of our daily lives and art in a way that we don’t always realize. But if you want to start incorporating more collage elements into your work, here are some tips on how to do so:
The original collage
To better understand the digital collage, let’s first take a look at an example of physical collage.
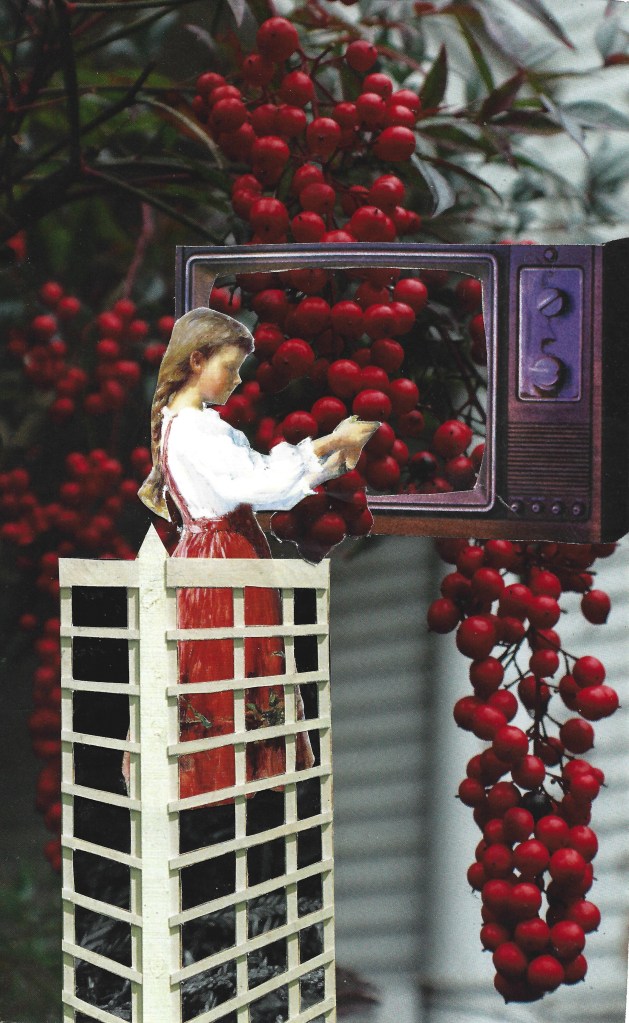
This is Low Hanging Fruit, a collage by my friend Angelica Urquizo (she does a lot of gorgeous poetry and collage work, check out her Instagram here). I chose this piece because it has a lot of the effects that I’ll compare and contrast with digital collaging below. Collage can include any elements found- text, logos, bodies, textures. Really anything you could want to glue, or otherwise affix, to a page.
Check it out, or pull up some of your own favorite examples of collage while we dive into the digital sphere.
Why Digital Collage?
The only real difference between a traditional collage and a digital collage is that you are using digital elements. Whether they are things that exist exclusively digitally (such as a computer generated image or something which was painted in Procreate), or something which has been digitized (scans of books, pictures of an object, etc).
So why don’t we just stick with physical collage? Well, there’s a lot of reasons. One is that our world has gone digital, from our communication to our work to how we ingest art. If I were to guess, I’d say you were probably looking at a computer for at least 3 hours today, and I know you’re reading this on a screen right now.
But another reason why we use digital information (the more inclusive term for “digital object” since you may use text, people, and other types of information in your design), is that we have a lot more control over the item. In a physical collage, we are beholden to the size and shape of the item given to us from whatever we sourced the item from. In a digital format, we can easily change the color, size, shape, and more of the image. We can make it something entirely our own.
It also takes up less space. That’s not something we’ll dig too deep into, but every person I know who does digital collage has a mountain of materials in various states of organized (not to put you on the spot, Angelica). My external hard drive may be a nightmare, but my wife doesn’t need to clean it off the table for us to eat dinner.
Whatever your reason, digital collage can become a great method of expression.
Finding Materials
Your first step is finding kick ass material. But where should you start?
There are a lot of great websites out there that have databases full of images. Some of the ones I use the most for my work is pexels.com or pixabay.com (not sponsors or websites I have any direct link with). There are a ton of free use images uploaded by incredible photographers for you to mine for elements to include in your art project (some of which I’ve seen in Canva designs, even). But if you’re looking for something with historic implications, or maybe something with more textual implications, you can’t go wrong with archive.org. You may know archive.org from the “way back machine,” but they are also working to catalogue both analog and digital artefacts for use by the populus. There’s also a lot of cool texts here, if you’re looking for free educational materials.

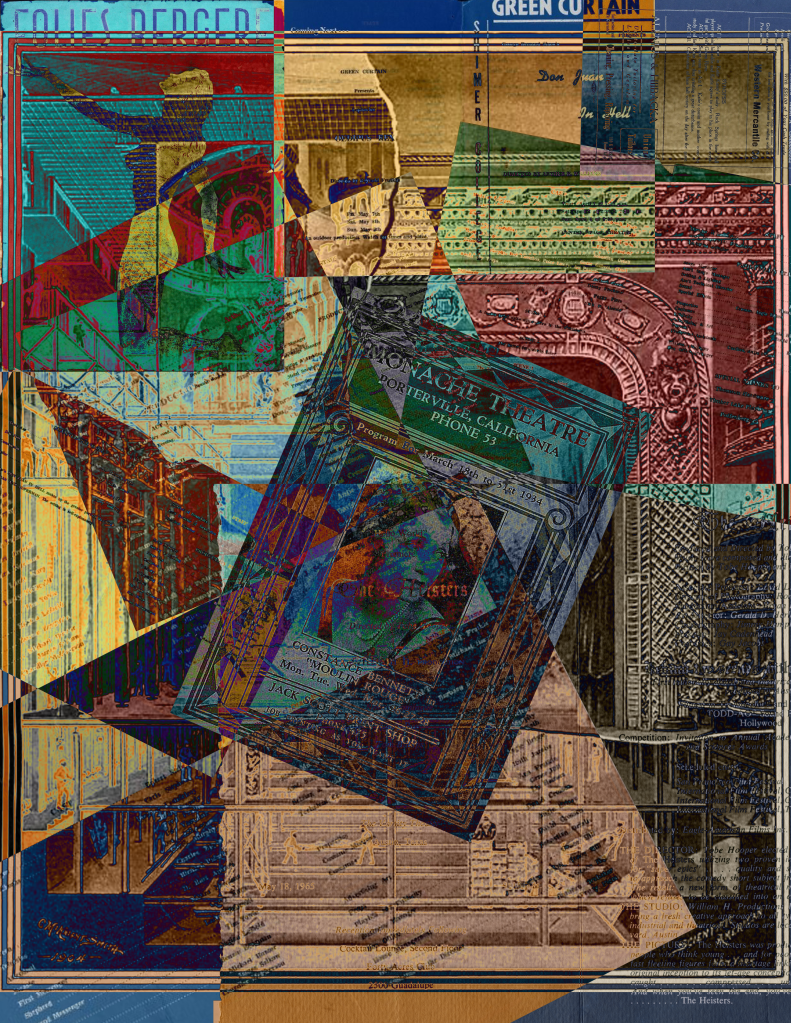
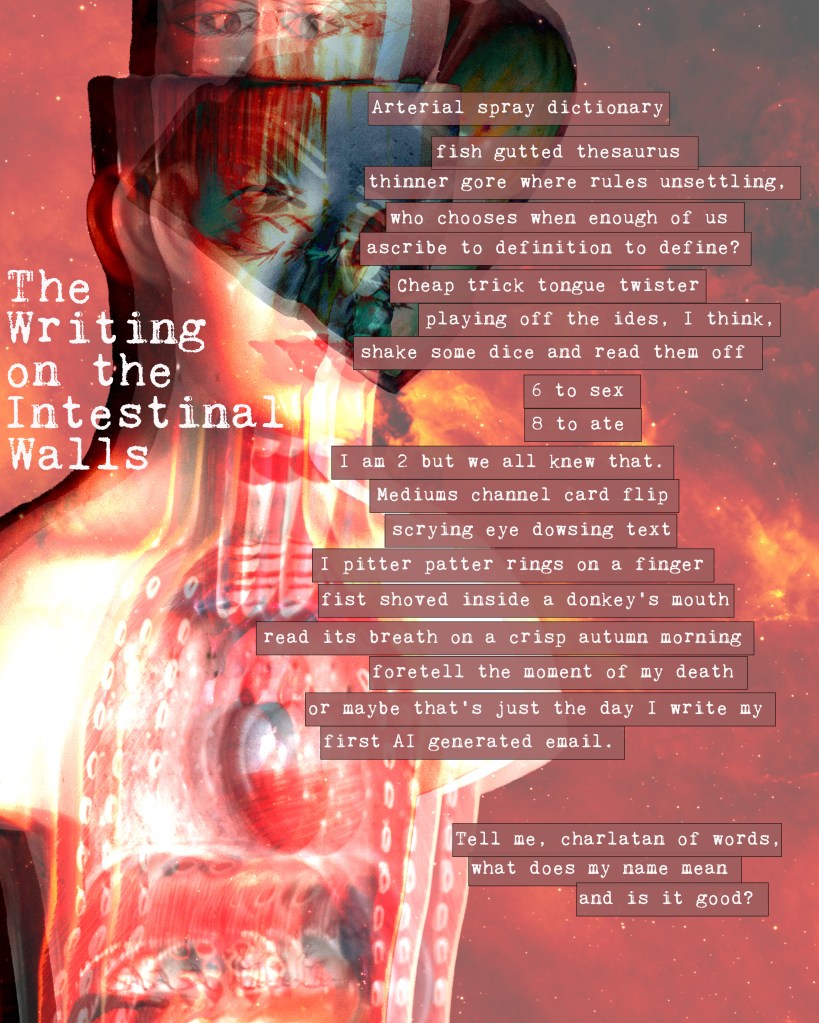
This cut up collage poem I made, in fact, was pulled from numerous per-WWI texts I pulled from archive.org to recontextualize.
That being said, consider the entirety of an image or text as you’re mining for material. When we look at an image of a person standing in a library, think about using the background table, or the books on the shelf. Don’t feel a need to only pull the subject of a photograph. In fact, you don’t even need to use the entirety of a subject. Maybe you want to make a person entirely collaged from different elements of other people- the arm of this person, the bathing suit of another, the head of a third. Frankensteining a subject together is easier in a digital setting (we’ll discuss that a little bit more in detail below).
One thing to consider is the ever changing world of protected copyright. If you use an image of Thor from Marvel without making a clear change to the image or context that allows it to fall under parody laws, you may find yourself at the receiving end of Marvel’s cease and desist letters. A good way to avoid that issue is to make sure you are making radical changes to make it your own, or to use free use images. Not saying to scare anyone, just making you aware!
Cut out your Images
One of the great things about digital collage is that you’re able to cut things out almost perfectly from an image. If you look at Angelica’s post above, there is a layer of the external image around the harvest girl. That’s not a criticism, that’s part of the aesthetic of collage! But in a digital space, you have the ability to be incredibly precise if you so choose.
Photoshop has a couple of options to cut out images. You can select the “object selection tool” which will outline an item and allow you to copy + Paste into your new canvas. It even allow you to select certain parts of an object, such as selecting the shirt of a person instead of their entire body.
If that one doesn’t work, you have the “lasso” tool, and it’s big brother “the magnetic lasso” tool. These allow you to trace an object and cut it out without the need of the selection tool, which doesn’t always do a perfect job detecting objects. The Magnetic Lasso tool even snaps to lines or colors, making it easier to cut close to an object, but be careful to close the loop by returning to your initial point or it can go a little crazy. But if you do want that “natural” cut of an item to emulate the traditional cut out technique of collage, use the regular lasso tool.
Once you’ve selected your item, use your good ol’ fashioned CTRL+C or CMND+C if on Mac, and then CTRL/CMND+V to paste onto your canvas. From here, you can resize your image to fit your needs. If it does not automatically allow you to resize, just use CTRL/CMND+t to open the option.
When resizing, think about:
Playing with Scale
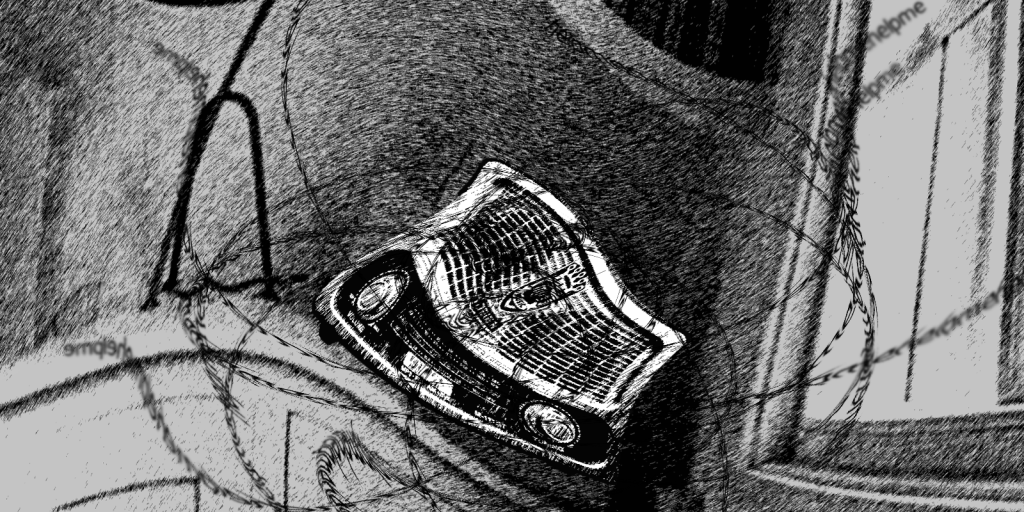
One of the best things about digital collage is being able to easily change the size of your information. Lets look at a couple of collages I’ve been working on (sneak peek for my 31 days of Monsters coming to my Instagram account on March 1st).
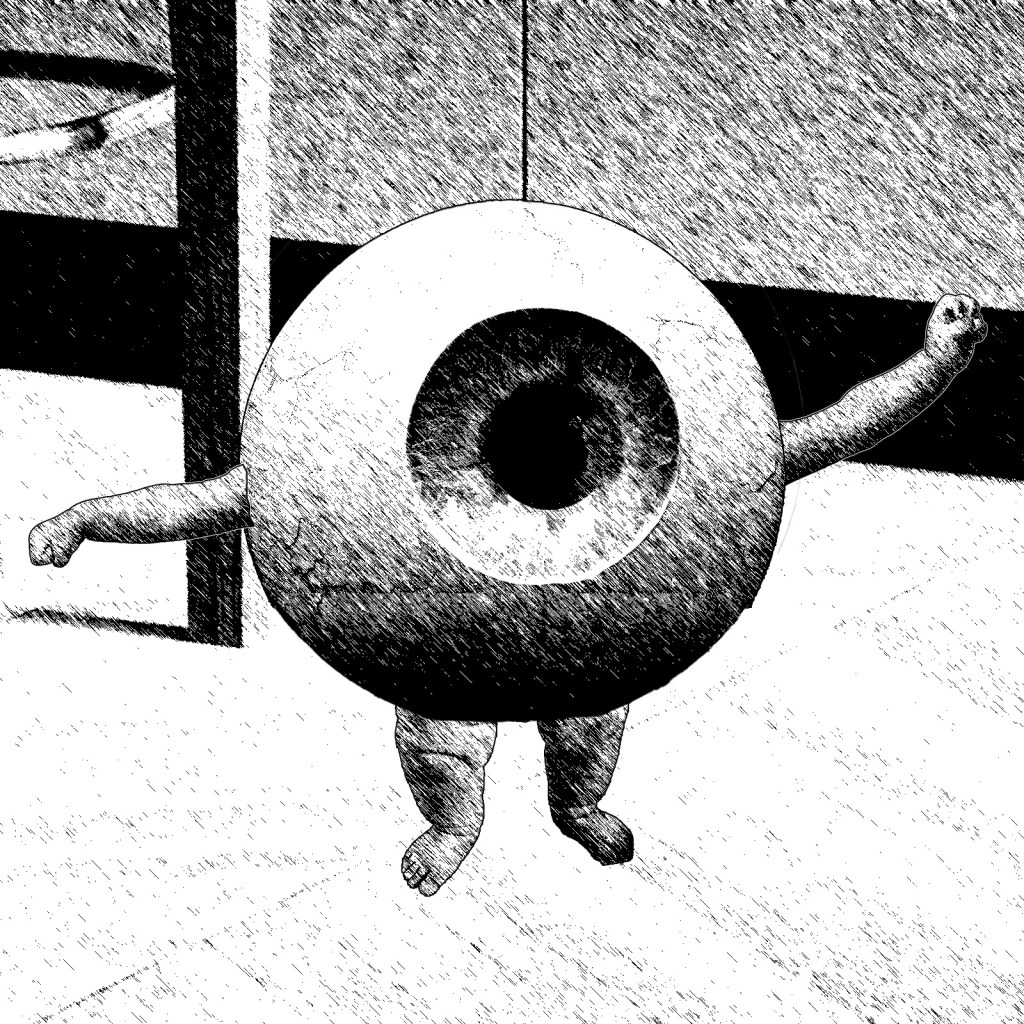
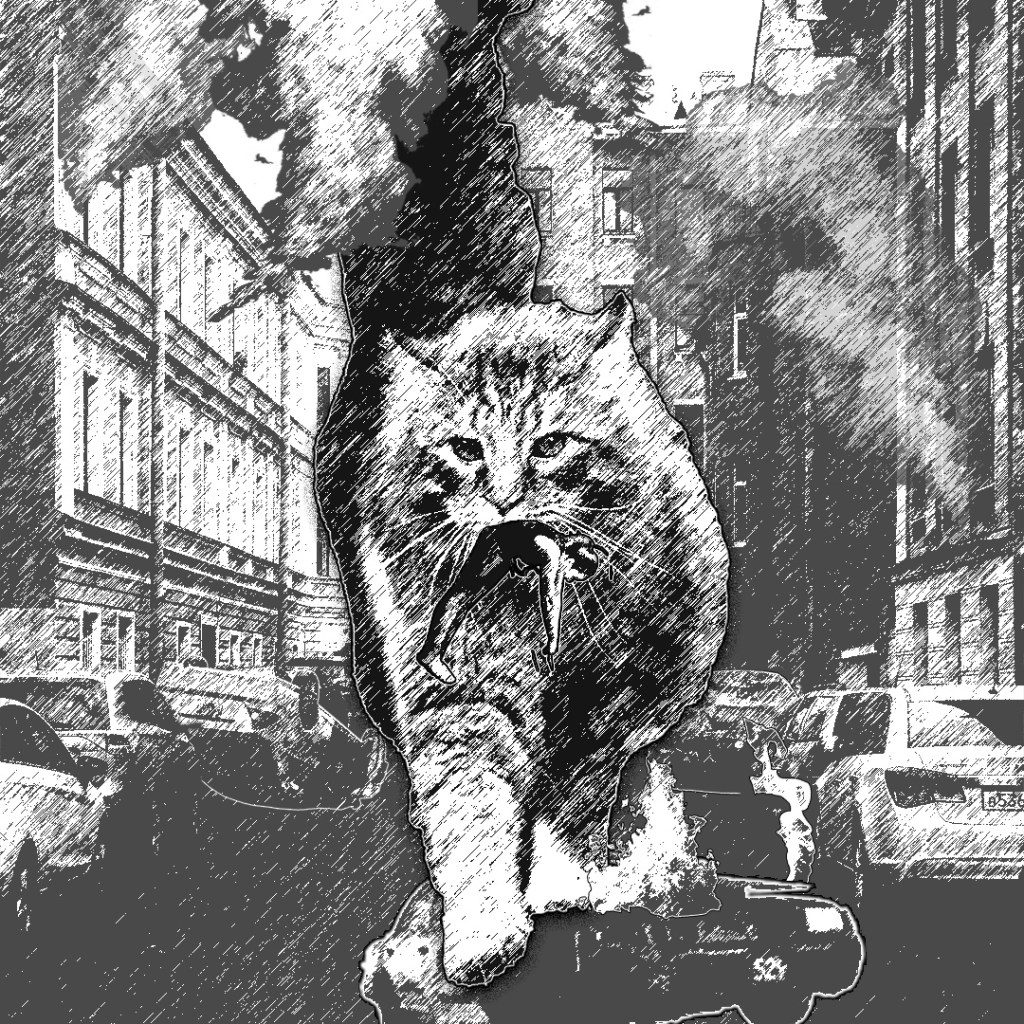
Here we see the use of two different scales. Both use the relation of two different images to make one feel smaller (Eyeball monster) and the other larger (Giant Cat). In actually, the two monsters are about the same size. But by changing the relational size to its surroundings, we change the context of the image itself. In fact, I didn’t make any changes at all to the cat (other than the normalizing filter I use for my work, discussed below). I instead spent a lot more time focusing on the background to change the way we perceive the cat, thus turning it into a monster.
You can use this type of scaling in a traditional collage as well. Angelica did an incredible job turning the small Holly Berries in giant, almost apple like objects by framing them in a television and putting them next to the harvesting girl. This forces us to use our own knowledge of the relative size of a young girl and a television to inflate the size of the holly berry in our mind. But in a digital context, you have a lot more control over each of those objects. You could take a single picture of a video playing on a TV with a girl picking berries and turn it into a giant plucking apples from a tree, or a bug sized girl trying to change the channel.
Changing the color of an image
Now, maybe you want to have an image that needs a bit of a color facelift. Maybe it’s a black and white image you want to colorize, or maybe you really think that Iron man would look cooler in hues of blue.
As in most digital tools, there are a bunch of ways that you can achieve this. One is to double click on the layer and choose “color overlay.” This will change the object to be one flat color, and is great if you’re trying to create shadows or outlines of objects. If you want to change the color, you do that by going to “Image>Adjustments>Hue/Saturation.”
When making changes like this, it may make your objects start to blend into the background. A great fix to that is to add an outline. You do this similar to the color overlay above, by double clicking on your layer, and clicking “stroke.” You can then go into that option and change the color/width of your outline, or can duplicate using the “+” button. If you look at the cat image above, you’ll notice a lot of the items have a black or white outline (and in many cases, both) to help separate the images from their surroundings so we know where one object ends and another begins.
Normalizing
Lastly, I want to go over the concept of making all of these objects look like they belong in the same universe, or Normalizing. Now, you may not want to do this, and that’s totally fine! You might like the contrast you get between objects in a collage. For me, I like making them all look like they’re part of the same piece, as I’m using these as parts of a comic book and I want to extend the narration that everything is taking place in the same location with the same people.
Normalizing can look like a few different things. It might be that you mess with the brightness or hue of your objects so that it looks like they are sourced from the same place (all of these changes are found in Image>adjustments). Maybe you want to add a filter (Filter>Filter Gallery). You could even use the Posterize or Equalize the images if you wanted to. How much you want the items to look the same or contrast is up to you as the artist, and carries different messages in the choice to normalize or not. Have fun with it! Try making a copy of your collage and normalize one and keep one contrasting and see how the message changes in your work. Art is about having fun with it.
There are thousands of things you can bring into your collage work. We didn’t even discuss using words in contrast to images, or how using famous images carry their own meaning and intent. I could write a whole book on all the ways you can approach collage (and have a list of many of the ones I’ve been reading lately if you’re interested in pursuing this yourself), but this should give you a good starting point.
My biggest recommendation is to just start. Don’t worry about it being perfect, just open up whatever tool you use for digital images and start playing with it. Make a messy heap of images. Don’t even save it if you don’t want to. But the best way to learn how all of these tools work is to use them and mess around with them. Once you have a solid foundation on the basics, use youtube to find tutorials on more in depth processes. Or, if you have a specific type of thing you want to do, google for just that type of thing and follow the steps. It’s out there, and not behind a paywall.
Be free my friends, be free and create!
-Erik
Further reading list (if interested in remix/collage):
Radical Cut Up- Nothing is Original. Edited by Lukas Feiress
Art, Media Design, and Post Production. By Eduardo Navas
Steal Like an Artist. By Austin Klean
The Adobe Photoshop Manual. By Frank Walter

Leave a comment